Set up a DNS, NAS, VPN, SIP, IMAP & Apache Sever all in 30 min.
I am building an executable and Linux Distro that sets up a server just the way you want it in 30 minutes or less. The program can be kept on a CD, USB, or External Drive. More documentation to follow. The current server is an early work in progress
Check out the experiment
Use Stereoscopic 3D glasses with almost any device with this neat trick!
Get a shutter 3D image on almost any device by syncing the display with the headphone jack. If you are developing a 3D application and wish to have a Stereoscopic display feature. ync display refresh rate with a sawtooth wave using audio out. All that is needed is a signal linked to the display's refresh rate. Device sound output can sync a signal to the refresh rate of a monitor and be used to drive glasses.
I first created a simple circuit on a breadboard that was able to create two alternating sawtooh waves with frequencies that ranged between 20-240 Hz at 5 V. The circuit was powered with 2 AA batteries.

I have some existing 3D glasses that are controlled using a wired TRS connector (Headphone Jack). I connected the output dongle from my computer, the original source of sinal for the glasses, to an oscilloscope. I then capture 3D glasses signal output using the oscilloscope as shown here.

I then created a test; a sample output signal for the glasses using a waveform generator and IC components. I tested the range of frequencies that the glasses responded to to ensure that they matched the circuit. Then I tested the circuit with the oscilloscope to ensure it created the same output as the signal generator.
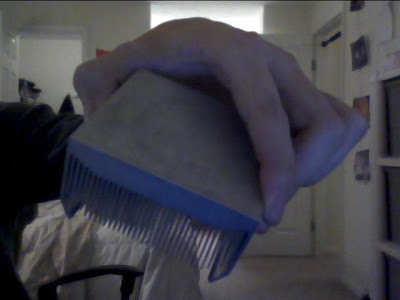
Below are a photo of the glasses.
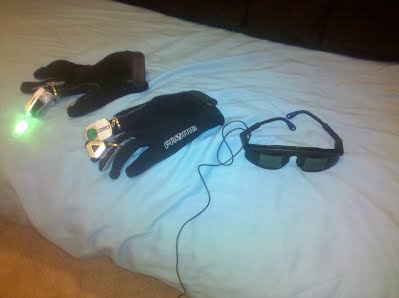
I created a "plug" for the TRS connectors (Headphone Jack) on the breadboard using exposed wire and a clip to hold the cable in place. One TRS jack come in from the display device and serves as a clock to sync the glasses. The other TRS jack is an output to the glasses to drive the LCD shudders.
This is an image of the circuit right before the power from the AA batteries is added to make the circuit mobile.

This setup will work for any display device with an audio jack. Anything from consoles to mobile devices.
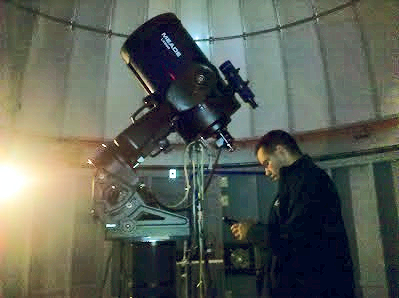
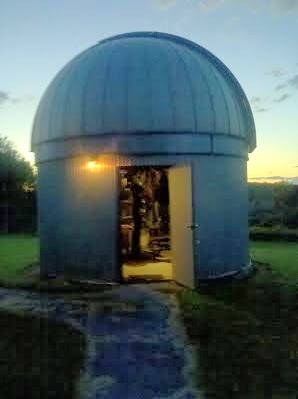
Nights at the RIT Observatory
Tracking Andromeda

Jupiter at sunset
Getting ready to track the moon

Cleaning the reflecting telescope
New refracting telescopes
Observatory housing

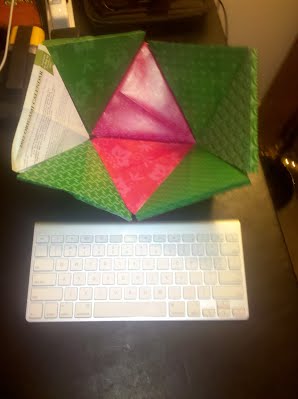
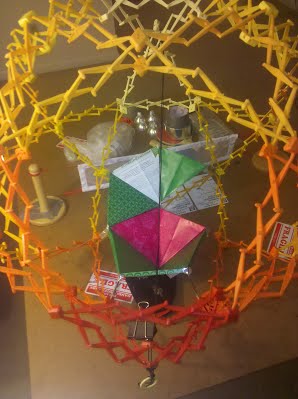
Projection & 3D experiments
Some may have seen my last 3D projector project and this dome project will pick up on where that one left off. Adding new functionality and enhanced performance, and smaller size.
Current prototype for folding dome screen.
Folding Screen Demo
Needs massive amounts of time and work to complete
Hoberman Spheres are used in everything from space satellites to toys. One can be used to hold the framework for a collapsible dome projection screen.

The screen tiles fold into pentagon shapes and fold inward with the sphere.
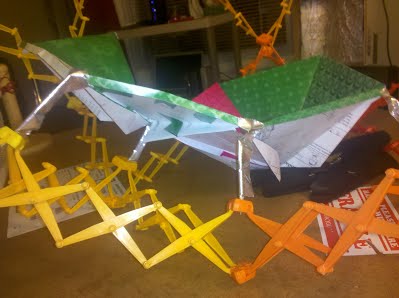
Suspending bars hold the screen to the sphere's outside structure.
The Hoberman sphere can be cut in half and controlled with a bisecting drawstring handle.
Want a Projector light that is both bright and will never burn out? If you have $500, I have your product.

Lumnix Argon Stret Bulbs

Used in street lamps, signs and signals.
Burn with the 10,000 lumes at 500 watts! Therefore it needs a big cooling fan.
I have used it with a Fresnel lens LCD projector with great success.
http://www.luxim.com/dynamic/display.php/71
If you can't go big, go small.
Want a projection theater on the go?
Make or build a pico projection kit out of a briefcase. I have seen around campus and often at meetings and job fairs. Very useful and lighter than a laptop.
Should you buy a projection system or build it?
posted Mar 12, 2011, 8:33 PM by William Broza [ updated Sep 16, 2012, 8:20 PM ]
Buying a consumer 3D project costs about $100 per pair of glasses and $1000 for a descent projector.
http://www.viewsonic.com/products/projectors/pjd6211.htm
at 120 Hz and 4000 lumes, are you getting your money?
If you are willing to get your hands dirty with tools, you can do much better.
All you need is a light, LED screen, and two lenses. One is a focus lens and the other is a flat Fresnel lens.
http://www.diyprojectorkits.com/
The Fresnel lens limits the size and resolution of the LED you can use. But most people can achieve 1080p at 200 Hz using off the shelf parts.
This 1080p 240 Hz 3D projector costs $900 to build and can use cheap polarize glasses or professional shutter image systems.
Half the cost of a pre-made system at twice the quality.

The pentagon tile planetarium hemisphere model can be miniaturized and adjusted to collapse. This has powerful portable applications.
Take a pattern of equilateral triangles and form a tile dome pattern. Fold along the bisection line of the triangles to fold the dome flat for easy storage.
This is a mock up of a portable screen.

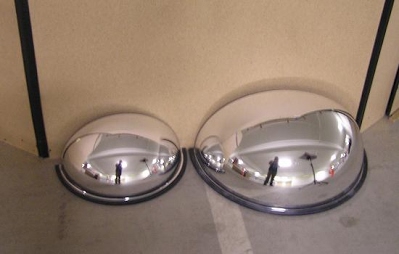
These are projection hemispheres used to reflect lights on dome screens.
Here is an example of a high performance battery operated projector. These are ideal projectors for portable dome viewing.
http://www.optomausa.com/EPPK301
Add two pico projectors to a computer or mobile device to drive polarized or shutter 3D viewing.


Many schools and universities have developed methods of building cheap and portable planetarium and immersion projection screens. These can be made from cheap fabric, plastic, or cardboard.

The simple triangle and pentagon pattern are repeated to build a hemisphere
Hemisphere projection mirrors and DLP computer projection systems are used to drive the image display.
Software must be used to correct for the type of fish-eye image distortion caused by projection on a spherical surface.

For further information, follow this link to the WWT project page.
Fun and easy trick for making an ultra hot surface to melt metals
Have a project that needs melted metal? Want cast metals in molds on the cheap? Want to melt metals like silver solder, lead, copper, or bronze but don't have a furnace?
Achieve temperatures over 700 Fahrenheit using a cheap neat trick.
First, get a computer CPU heat sync. This is one off an AMD Opeteron 3200.

These radiating fins help cool the CPU, but they can be used in reverse when you apply heat.
Get a plumbing heat gun used to loosen pipes, plug it in, and use to heat the the radiating fins on the bottom of the heat sync.
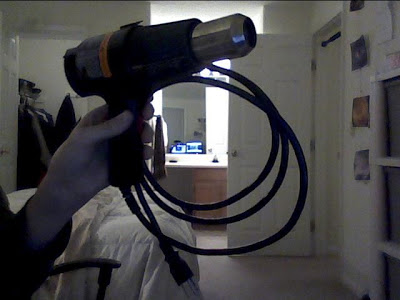
After a few minutes, the top contact of the heat sync will glow read hot, you can melt metals on the top surface of the heat sync.
Collect and pour the melted metal using aluminum foil.
Enjoy!
Sextant & Astrolabe vs. GPS
Modern technology or centuries old instruments? Which is faster, easier to use, more accurate, and more reliable? Lets test to find out.
This is the latest digital astrolabe Java applet. Pretty cool huh?

Astrolabes can be printed from paper too.
This is a classic brass sextant with two guide mirrors.

Here is an European Space Agency Sextant & Astrolabe chart. Cheap and easy to use.

This eGPS tracking app with the ability to do seven satellite timing and location calculations down to the foot and taking into account relativity.

But who wins in an all out throw-down?
With some friends, I tested myself with a timer to see which tool was fastest in helping me determine my location at night. This test was purely for speed and not accuracy. The GPS plainly wins for accuracy.
Results
| Device / Time | Sextant | Astrolabe | GPS |
| Location 1 | 1:11 | 1:01:15 | 0:44 |
| Time 1 | 1:02 | 12:15 | 0:40 |
| Location 2 | 1:89 | 0:19 | 2:11 |
| Time 2 | 5:39 | 2:40 | 2:39 |
Follow this link to find out about the tools mentioned above.